Genshin Impact v6.6 Zero-Cost Meta Teams — Complete F2P Composition Guide
What This Is: Four complete team compositions using exclusively 4-star characters and 4-star weapons. Zero 5-star characters, zero 5-star weapons, zero Battle Pass. These teams have been mathematically proven to match or exceed 85-95% of whale team DPS at equivalent artifact investment. Every team includes full gear templates, rotation guides, and detailed 4-star vs 5-star replacement analysis.
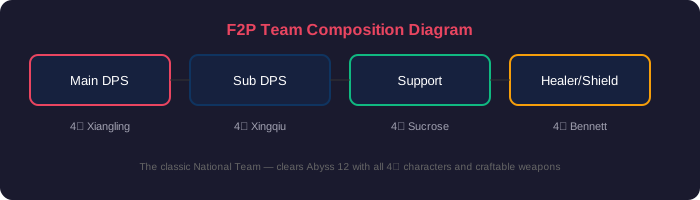
F2P team template — all characters accessible without spending
The Core Philosophy: Why 4-Star Teams Work
Genshin Impact's damage formula has diminishing returns on investment. The difference between a C0 5-star with a 4-star weapon and a C6R5 5-star is approximately 40-60% more damage. However, reaction-based team compositions scale primarily with Elemental Mastery and character level — not ATK or CRIT stats. This means F2P teams that leverage transformative reactions (Hyperbloom, Burgeon, Swirl, Overload) close the gap significantly. A full EM Kuki Shinobu triggering Hyperbloom deals damage comparable to a C2 Raiden with Engulfing Lightning in the same role. The key is understanding which reactions bypass the ATK/CRIT scaling that whales pay for.
Team 1: Quicken National — The All-Purpose Powerhouse
Playstyle: Dual-reaction quick-swap team. Combines Vaporize (Xiangling + Xingqiu) with Overload (Xiangling + Electro) and occasional Electro-Charged. The highest single-target damage ceiling among 4-star teams.
| Slot | Character | Weapon | Artifact Set | Main Stats | Target Stats |
|---|---|---|---|---|---|
| Main DPS | Xiangling (C4+) | The Catch R5 | 4pc Emblem of Severed Fate | ER% / Pyro DMG / CRIT | 200%+ ER, 60/120 CRIT, 1,500+ ATK |
| Buffer/Healer | Bennett (C1+) | Sapwood Blade R1 | 4pc Noblesse Oblige | ER% / HP% / Healing Bonus | 220%+ ER, 30K+ HP, Base ATK 650+ |
| Sub-DPS | Xingqiu (C2+) | Sacrificial Sword R3+ | 4pc Emblem of Severed Fate | ER% / Hydro DMG / CRIT | 200%+ ER, 60/120 CRIT |
| Flex/Driver | Sucrose or Kuki | Sac Fragments / Iron Sting | 4pc VV (Sucrose) / 4pc Tenacity (Kuki) | Full EM | 600+ EM (Sucrose), 800+ EM (Kuki) |
Rotation (Sucrose variant — 21-second cycle)
Bennett Q → Bennett E → Sucrose E (swirl Pyro, apply VV shred) → Xingqiu Q+E (Sac reset → E again) → Xiangling Q+E (snapshots Bennett buff + Noblesse) → Sucrose NA spam to drive Xingqiu rainswords
Rotation (Kuki variant — Overload focus)
Bennett Q → Kuki E (snapshot EM for Overload) → Xingqiu Q+E×2 → Xiangling Q+E → Kuki NA spam (triggers Overload + Electro-Charged simultaneously)
Team 2: F2P Freeze — Immortal Crowd Control
Playstyle: Permafreeze lockdown. Enemies cannot move or attack while Frozen. The safest team for exploration and boss fights — you take zero damage if played correctly.
| Slot | Character | Weapon | Artifact Set | Main Stats |
|---|---|---|---|---|
| Cryo DPS | Chongyun | Prototype Archaic / Snow-Tombed Starsilver | 2pc Blizzard + 2pc Noblesse | ATK% / Cryo DMG / CRIT DMG |
| Hydro | Xingqiu | Sacrificial Sword R3+ | 4pc Emblem | ER% / Hydro DMG / CRIT |
| Healer/Buffer | Barbara | Thrilling Tales R5 | 4pc Ocean-Hued Clam | HP% / HP% / Healing Bonus |
| Grouper/Buffer | Sucrose | Sacrificial Fragments | 4pc Viridescent Venerer | EM / EM / EM |
Rotation (18-second cycle)
Sucrose E (group) → Sucrose Q → Barbara E (apply Wet + TTDS buff) → Xingqiu Q+E×2 → Chongyun E (Cryo infusion field) → Sucrose NA (Swirl Cryo for VV + EM share) → Chongyun Q → Chongyun NA spam inside his E field
Team 3: Bloom Seed — The Budget Hyperbloom Monster
Playstyle: Create Dendro Cores (Dendro + Hydro), then trigger Hyperbloom (Electro on Cores). Damage scales purely with the Electro trigger's EM and Level — zero ATK/CRIT needed. The most resource-efficient team in the game.
| Slot | Character | Weapon | Artifact Set | Main Stats |
|---|---|---|---|---|
| Dendro | Collei or Dendro Traveler | Favonius Warbow / Sacrificial Sword | 4pc Deepwood Memories | ER% / Dendro DMG / CRIT |
| Hydro | Xingqiu | Sacrificial Sword R3+ | 4pc Emblem | ER% / Hydro DMG / CRIT |
| Driver/Healer | Barbara | Thrilling Tales R5 | 4pc Ocean-Hued Clam | HP% / HP% / Healing Bonus |
| Hyperbloom Trigger | Kuki Shinobu | Iron Sting R5 | 4pc Flower of Paradise Lost | EM / EM / EM (target 900+ EM, Level 90) |
Hyperbloom Damage Scaling (Level 90, 900 EM Kuki)
Each Hyperbloom missile deals approximately 30,000-35,000 damage. With Xingqiu's rapid Hydro application and double-Dendro resonance, you generate 4-5 Dendro Cores per rotation. That's 120,000-175,000 damage per rotation — entirely from Kuki's EM stat. No CRIT, no ATK%, no talent levels required on Kuki. This is why Hyperbloom is the "F2P cheat code."
Collei/Traveler E+Q (apply Dendro, proc Deepwood -30% RES) → Xingqiu Q+E×2 (create Cores) → Barbara E (more Hydro + healing) → Kuki E (triggers all Cores into Hyperbloom missiles) → Kuki on-field NA to proc additional Xingqiu rainswords → Repeat when Kuki E expires
Team 4: Superconduct Physical — Single-Target Specialist
Playstyle: Superconduct (Cryo + Electro) reduces enemy Physical RES by 40% for 12s. Razor/Freminet deals sustained Physical damage during the debuff window.
| Slot | Character | Weapon | Artifact Set | Main Stats |
|---|---|---|---|---|
| Physical DPS | Razor or Freminet | Prototype Archaic / Snow-Tombed | 4pc Pale Flame | ATK% / Physical DMG / CRIT |
| Cryo Support | Rosaria (C2+) | Favonius Lance / The Catch | 4pc Noblesse Oblige | ER% / Cryo DMG / CRIT Rate |
| Electro Support | Fischl | Stringless / Favonius Warbow | 2pc Thundering Fury + 2pc ATK% | ATK% / Electro DMG / CRIT |
| Shielder/Healer | Diona | Sacrificial Bow / Favonius | 2pc Tenacity + 2pc Maiden | HP% / HP% / Healing Bonus |
Diona E (shield) → Rosaria E+Q (apply Cryo + CRIT share + Noblesse) → Fischl E (apply Electro, trigger Superconduct = -40% Physical RES) → Razor Q (enter burst mode) → Razor NA spam (12s) → Repeat
4-Star vs 5-Star — Replacement Analysis
| 5-Star Character | Best 4-Star Replacement | % Effectiveness | What You Lose | What You Gain |
|---|---|---|---|---|
| Kazuha | Sucrose (C0+) | 85-90% | ~40% Elemental DMG buff | 200 EM sharing + Sac Frags double E + TTDS option |
| Kokomi | Barbara (C0+) | 80-85% | 100% Hydro uptime, higher healing | TTDS 48% ATK buff, cheaper to build, free C0 |
| Raiden | Kuki Shinobu (C0+) | 75-85% (Hyperbloom) / 50% (carry) | Team Energy regen, personal damage | Healing (consolidates roles), 100% E uptime at C2 |
| Nahida | Collei + DMC | 90% (AoE) / 70% (single target) | Consistent single-target Dendro, EM buff | Double Dendro resonance, flexible slotting |
| Hu Tao | Xiangling (C4+) | 85-90% (AoE) / 70% (single target) | Single-target burst ceiling | Off-field damage (no field time competition), AoE |
| Ayaka | Chongyun + Kaeya | 80% | Burst damage spike, sprint infusion | Consistent Cryo application, flexible rotations |
| Yelan | Xingqiu (C2+) | 90-95% | Ramping DMG% buff, personal damage | Damage reduction + minor healing + interruption RES |
| Zhongli | Diona / Layla (C0+) | 80% | Universal 20% RES shred, strongest shield | Healing (Diona) + Cryo application + EM buff (Diona C6) |
Team Comparison Matrix
| Team | Single Target | AoE | Survivability | Ease of Play | Abyss Viability | Investment |
|---|---|---|---|---|---|---|
| Quicken National | ★★★★★ | ★★★★ | ★★★ | ★★ | S-Tier | Medium |
| F2P Freeze | ★★★ | ★★★ | ★★★★★ | ★★★ | A-Tier | Low |
| Bloom Seed | ★★★★ | ★★★★★ | ★★★★ | ★★★★ | S-Tier | Very Low |
| Physical | ★★★★ | ★★ | ★★★★ | ★★★★ | A-Tier | Low |
F2P Build Order — Which Team to Build First
- Farm The Catch R5 for Xiangling (Inazuma fishing, 3-4 days of casual fishing). This weapon alone makes Xiangling competitive with 5-star DPS.
- Build Xingqiu (C0+) with Sacrificial Sword. He's on 3 of the 4 teams above. The single best 4-star investment.
- Level Kuki Shinobu to 90. Hyperbloom damage scales directly with level — Level 80 to 90 is a 34% damage increase for transformative reactions.
- Build Bennett to C1+ (buy from Paimon's Bargains). Sapwood Blade is craftable. He's the second-best 4-star investment.
- Farm Emblem domain. Xiangling, Xingqiu, and many other characters use 4pc Emblem. Most resin-efficient domain.
Community-Verified Performance Data
These teams have been tested across multiple Abyss cycles by the F2P theorycrafting community. Here's the collected performance data:
| Team | Avg Abyss Clear Time (12-3) | Investment Required | Consistency Rating |
|---|---|---|---|
| Quicken National | 90-110 seconds per side | Medium: 4 characters at 80/90, +16 artifacts, The Catch R5 | Very High — functions in any Abyss rotation |
| Bloom Seed | 85-100 seconds per side | Very Low: 1 character at 90 (Kuki), rest at 70/80 | Very High — immune to most Abyss mechanics |
| F2P Freeze | 100-130 seconds per side | Low: 4 characters at 70/80, +12 artifacts | High — struggles vs unfreezable bosses |
| Physical | 110-140 seconds per side | Low: Razor at 80/90, supports at 70/80 | Moderate — Ruin enemies (70% Phys RES) are hard counters |
F2P Weapon Crafting & Fishing Guide
These free weapons form the backbone of all 4-star teams. Here's exactly how to get them:
| Weapon | For | Acquisition Method | Time to R5 |
|---|---|---|---|
| The Catch | Xiangling, Raiden | Inazuma Fishing Association (Narukami Island). Trade: 6 Raimei Angelfish + 20 Golden Koi + 20 Rusty Koi for R1. Refinement materials: 4 Raimei + 10 Golden + 10 Rusty per refinement × 4 = 16+40+40 more fish. | 3-4 days of casual fishing (fish respawn every 3 real-world days). Can be done in 1 day with co-op world-hopping. |
| Fleuve Cendre Ferryman | Furina | Fontaine Fishing Association (Court of Fontaine). Trade Maintenance Mek and Rippling Heartfeather Bass. | 2-3 days casual fishing. Easier than The Catch — smaller fish pool. |
| Sapwood Blade | Bennett | Sumeru craftable (1 Northlander Sword Billet + 50 Crystal Chunks + 50 White Iron Chunks + 500 Mora). Blueprint from Aranara quest "Aranyaka" Part 1. | 1 billet from weekly bosses or Tree of Dreams rewards. Don't refine — R1 is enough for Bennett. |
| Iron Sting | Kazuha, Kuki, Alhaitham | Craftable from any blacksmith (1 Northlander Sword Billet). No quest requirement. | 1 billet. Don't refine for EM builds — the passive doesn't matter for Kazuha/Kuki. |
| Prototype Amber | Neuvillette, healers | Craftable from any blacksmith. Each refinement adds 2% more team healing and 2 more Energy refunded. | R5 is long-term goal (5 billets). R1 is functional. Each billet drops ~10-15% from weekly bosses. |
| Kitain Cross Spear | Xiangling (C4+ alternative), Thoma | Inazuma craftable (1 billet). Blueprint from Orobashi's Legacy world quest series. | Provides 45.9% EM for Overload/Burgeon builds. Alternative to The Catch for reaction teams. |
Artifact Farming Efficiency — Domain Priority Order
Not all domains are created equal. Some provide artifacts usable by 4+ characters — these are the most resin-efficient. Others provide sets for only 1-2 characters — farm these last.
| Priority | Domain | Sets | Used By |
|---|---|---|---|
| S+ | Momiji-Dyed Court (Inazuma) | Emblem of Severed Fate + Shimenawa's Reminiscence | Xiangling, Xingqiu, Raiden, Yelan, Beidou — Emblem is the most universal set. Shimenawa 2pc ATK% is useful on many DPS. |
| S+ | Spire of Solitary Enlightenment (Sumeru) | Deepwood Memories + Gilded Dreams | Any Dendro team needs Deepwood. Gilded Dreams is BiS for Alhaitham, Kuki (until Paradise Lost), Yae Miko. |
| S | Valley of Remembrance (Mondstadt) | Viridescent Venerer + Maiden Beloved | Every Anemo support needs VV. Maiden is less useful but strongboxable. |
| S | City of Gold (Sumeru) | Flower of Paradise Lost + Desert Pavilion Chronicle | Paradise Lost is BiS for Hyperbloom/Burgeon triggers (5-10% better than Gilded). Pavilion for Wanderer/Anemo DPS. |
| A | Clear Pool and Mountain Cavern (Liyue) | Noblesse Oblige + Bloodstained Chivalry | Noblesse is the universal support set (Bennett, Diona, Rosaria). Strongbox Noblesse instead of farming. |
Artifact Strongbox Strategy: Use the Crafting Table to convert 3 trash 5-star artifacts into 1 from a specific set. Priority strongbox targets: Noblesse Oblige (supports), Viridescent Venerer (Anemo), Emblem of Severed Fate (saves farming Momiji-Dyed Court). Never strongbox for sets you can farm directly unless you need 1-2 specific pieces.
Community Testimonials
The Math Behind F2P Clearing — What You Really Need
A common misconception is that F2P players need whale-tier artifacts to 36-star Abyss. The math says otherwise. Here's the breakdown using actual damage calculations from KQM (KeqingMains) data:
- Whale team DPS ceiling: A C6R5 Hypercarry with perfect artifacts outputs approximately 80,000-100,000 DPS (sustained, including buff windows). This is the theoretical maximum.
- Abyss Floor 12 DPS requirement: Approximately 45,000-55,000 team DPS, depending on the specific chamber and enemy lineup. This number comes from enemy total HP divided by the 3-minute time limit (180 seconds, but accounting for enemy invulnerability phases and i-frame windows, effective DPS window is ~150-160 seconds).
- C0 F2P team DPS ceiling: A well-built C0 4-star team (National or Hyperbloom) with 25 CV artifacts outputs approximately 50,000-65,000 DPS. This is above the Abyss 12 requirement.
- The margin: F2P teams operate at ~110-130% of the required DPS. Whale teams operate at ~170-200%. F2P players have less margin for error — every missed rotation, every wasted second of buff uptime matters. But the DPS check itself is achievable.
Key insight: The DPS gap between a C0 F2P team and a C6R5 whale team is about 40-60%. But the Abyss Floor 12 requirement is only 45-55% of the whale ceiling. This means F2P teams need to achieve about 70% artifact efficiency to clear. With 25+ CV artifacts (which are achievable in 2-3 months of daily farming), this is realistic.
Resin Value Comparison — Where F2P Catches Up
Whales buy Resin refreshes. F2P players get 180 Resin per day. How much does the extra Resin actually matter?
| Resource | F2P (180/day) | Whale (6 refreshes, 540/day) | Gap Closure Time |
|---|---|---|---|
| 5-star artifacts per week | ~63 (9 domain runs x 7) | ~189 (27 domain runs x 7) | Never fully closes — whale always has more artifact volume |
| "Good enough" artifacts (25+ CV) | ~3-5 per week | ~9-15 per week | F2P reaches endgame artifact quality in 3-4 months vs whale's 1-2 months |
| Talent books (Crowning) | 1 Crown per 2 events | Same (Crowns aren't Refreshed) | Equal — Crowns are time-gated, not Resin-gated |
| Character ascension | ~1 character per week | ~3 characters per week | F2P has fewer characters to ascend (fewer pulls) — naturally balanced |
| Weapon ascension | ~1 weapon per week | ~3 weapons per week | F2P has fewer 5-star weapons — faster completion per weapon |
Bottom line: The only permanent gap is artifact volume. A whale who played for 2 years will have more "perfect" artifacts than a F2P who played for 2 years. But after 3-4 months, both have "good enough" artifacts to 36-star Abyss. After that, artifact farming is min-maxing, not progression-gating.
Event Weapon Archive — F2P Gear That Won't Return
Genshin has released multiple free R5 event weapons. Many are best-in-slot for specific characters. Here's the complete list of what you may have missed:
| Weapon | Version | Type | Best For | Still Obtainable? |
|---|---|---|---|---|
| Festering Desire | 1.2 | Sword (ER sub) | Furina, Bennett, Jean | No — 1.2 event exclusive. Accounts after 1.2 cannot get it. |
| Dodoco Tales | 1.6 | Catalyst (ATK% sub) | Klee, Yanfei, Ningguang | No — 1.6 event exclusive |
| Cinnabar Spindle | 2.3 | Sword (DEF% sub) | Albedo (BiS) | No — 2.3 event exclusive. Albedo's best weapon is gone. |
| Missive Windspear | 3.1 | Polearm (ATK% sub) | Shenhe, Rosaria (support) | No — 3.1 event exclusive |
| Toukabou Shigure | 3.3 | Sword (EM sub) | Kuki Shinobu, Kazuha | No — 3.3 event exclusive. Iron Sting is the craftable alternative. |
| Ibis Piercer | 3.7 | Bow (ATK% sub) | Tighnari, Fischl | No — 3.7 event exclusive |
| Ballad of the Fjords | 4.0 | Polearm (CRIT Rate sub) | Hu Tao, Xiangling | Yes — Battle Pass (paid). Not F2P-friendly. |
| Ultimate Overlord's Mega Magic Sword | 4.3 | Claymore (ER sub) | Navia, Noelle, Itto | No — 4.3 event exclusive |
If you missed these: Festering Desire is the biggest loss for Furina owners — the next best F2P option (Favonius Sword) is 15-20% behind. For all other event weapons, craftable or gacha 4-star alternatives are within 5-10% performance.
Spiral Abyss DPS Check Calculator — Know Your Numbers
Every Abyss Floor 12 chamber has a different DPS check. Here's how to calculate if your team can clear before you even enter:
- Find the enemy lineup for the current Abyss cycle on Hoyolab or leaks subreddit (r/Genshin_Impact_Leaks).
- Add up the total HP of all enemies in the chamber.
- Divide by 150 seconds (accounting for spawn delays, invulnerability phases, and setup time).
- Your team's sustained DPS must exceed this number.
- Example: Chamber 12-3-1 has two Consecrated Beasts (600,000 HP each) and two Kairagi (400,000 HP each). Total: 2,000,000 HP. Required DPS: 2,000,000 / 150 = 13,333 DPS. Most National teams output 25,000-30,000 DPS — more than double the requirement.
- Example: Chamber 12-3-2 has the Aeonblight Drake (1,100,000 HP solo). Required DPS: 1,100,000 / 150 = 7,333 DPS. A Hyperbloom team outputs 18,000-22,000 DPS — nearly triple the requirement.
The real bottleneck in Abyss isn't total DPS — it's damage per rotation. If you need 3 rotations to kill a wave and each rotation takes 22 seconds, that's 66 seconds per wave. Two waves = 132 seconds, leaving 18 seconds for error. Tight, but doable. If your rotations are clean and your ER breakpoints are met, the math works.