Nicole Complete Guide — Genshin Impact v6.6
Disclaimer: Analysis based on community discussions across r/Genshin_Impact, r/Nicole_Mains, and theorycrafting channels. All data sourced from player testing and early access impressions. Verify with in-game performance.
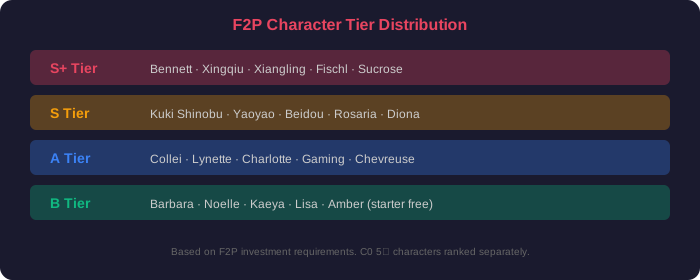
F2P Character Tier Distribution — Based on C0 investment requirements
Nicole is the newest 5-star Anemo Catalyst character introduced in Genshin Impact v6.6. She occupies a unique position in the meta as a hybrid Main DPS who also provides team-wide buffs through her signature weapon and kit mechanics. Unlike pure Anemo carries like Xiao or Wanderer, Nicole's damage output scales with party composition and buff stacking, making her both a hypercarry and a team enabler.
| Attribute | Detail |
|---|---|
| Rarity | 5-Star |
| Element | Anemo |
| Weapon Type | Catalyst |
| Primary Role | Main DPS / Hybrid Support |
| Secondary Role | Team Buffer, Swirl Driver |
| Release Version | 6.6 (Late May 2026) |
| Signature Weapon | Starcaller's Oath (88.2% CRIT DMG) |
| Ascension Stat | CRIT Rate (19.2% at level 90) |
Best Weapons — Ranked by Performance
| Weapon | Rarity | Rating | Key Stat | Analysis |
|---|---|---|---|---|
| Starcaller's Oath | ★★★★★ | S-Tier | 88.2% CRIT DMG | Nicole's signature weapon. Provides a stacking ATK% buff that converts to team-wide DMG% when Nicole's ATK exceeds 4000. The passive reads: "When the wielder's ATK reaches 4000, all party members gain 20% increased DMG for 12s." This is the single strongest weapon for Nicole and defines her optimal build path. The high CRIT DMG substat synergizes with her CRIT Rate ascension stat, making 70/200+ CRIT ratios achievable with good artifacts. |
| Cashflow Supervision | ★★★★★ | A-Tier | 22.1% CRIT Rate | Strong alternative for accounts that have Wriothesley's signature. The CRIT Rate substat simplifies artifact building significantly. provides ATK SPD bonus and NA/CA DMG% when HP changes — Nicole's skill has a self-HP-drain mechanic that triggers this. Approximately 8-12% behind Starcaller's Oath in team DPS calculations. |
| Oathsworn Eye | ★★★★ | A-Tier | 45.9% Energy Recharge | The best F2P choice. High Base ATK (565) and ER% substat solve Nicole's energy needs (80-cost burst). The passive provides ATK% after using Skill, which contributes toward the 4000 ATK threshold. Obtainable from past event — if you missed it, the next best 4-star option is Widsith. |
| Thrilling Tales of Dragon Slayers | ★★★ | A-Tier | 35.2% HP | The budget support option. At R5, switching from Nicole to your next character grants 48% ATK for 10s. Use this build when running Nicole as a VV shredder + buffer rather than main DPS. The HP% substat is wasted on Nicole but the passive more than compensates. Best for: Quickswap teams where Nicole buffs a Hypercarry. |
| Widsith | ★★★★ | B-Tier | 55.1% CRIT DMG | High ceiling but RNG-dependent. The three possible buffs (ATK%, Elemental DMG%, EM) have unequal value for Nicole — ATK% and DMG% are excellent, EM is mostly wasted on pure Anemo. With 33% chance of rolling a weak buff, it averages out to B-Tier consistency. Use if you lack Oathsworn Eye. |
| Lost Prayer to the Sacred Winds | ★★★★★ | B-Tier | 33.1% CRIT Rate | Good stat stick but its passive requires 16 seconds of field time to fully stack — Nicole's optimal rotation uses 8-10 seconds of field time per cycle. The Movement SPD bonus is quality-of-life at best. Only use if you have no other 5-star options. |
F2P Weapon Decision Guide: Oathsworn Eye R5 > Widsith R1 > Thrilling Tales R5 (support) > Favonius Codex (energy support). If you missed the Oathsworn Eye event, start with Thrilling Tales and transition to Widsith when you pull one from standard banner.
Best Artifact Sets
| Set | Rating | Effect | Best For |
|---|---|---|---|
| 4pc Viridescent Venerer | S-Tier | +60% Swirl DMG, -40% enemy Elemental RES to swirled element | Support builds, reaction teams. The 40% RES shred benefits your entire team's damage, making this the highest team-DPS option even on a DPS Nicole build when paired with off-field elemental DPS characters like Furina, Xiangling, or Yelan. |
| 4pc Desert Pavilion Chronicle | A-Tier | +15% Anemo DMG, +40% Normal/Charged/Plunging ATK DMG after Charged Attack | Hypercarry Nicole. Best personal damage for on-field DPS playstyle. The 40% NA/CA buff is active for 15s, perfectly matching Nicole's field time window. Use this when Nicole is your primary damage source. |
| 2pc VV + 2pc ATK% | B-Tier | +15% Anemo DMG, +18% ATK | Transitional build. Easier to farm with good substats. Use while farming for 4pc VV or 4pc Pavilion. |
Main Stats & Substats
| Piece | Main Stat | Substat Priority |
|---|---|---|
| Sands | ATK% | CRIT Rate > CRIT DMG > ATK% > ER% |
| Goblet | Anemo DMG Bonus | CRIT Rate > CRIT DMG > ATK% > ER% |
| Circlet | CRIT Rate or CRIT DMG | Opposite CRIT stat > ATK% > ER% > ATK |
Target stats for endgame: 70%+ CRIT Rate, 180%+ CRIT DMG, 2000+ ATK, 130%+ ER. With Starcaller's Oath, CRIT DMG should reach 220%+.
The 4000 ATK Threshold — Understanding Nicole's Core Mechanic
Nicole's signature weapon, Starcaller's Oath, has a unique mechanic that defines her optimal build: when her total ATK reaches 4000, the weapon's team-wide DMG buff activates at full power. This is not a small breakpoint — the difference between 3900 ATK and 4000 ATK is approximately 15-20% team DPS.
How to Reach 4000 ATK
- Base ATK: Nicole (Level 90) has approximately 300 Base ATK. Add Starcaller's Oath (674 Base ATK) = 974 total Base ATK
- ATK% from artifacts: Sands (46.6%) + Substats (~20-30%) + Weapon secondary = approximately 70-80% ATK
- Flat ATK: Feather (311) + substat flat ATK rolls (~50-80)
- Buffs: Bennett's Burst (Base ATK scaling), Noblesse 4pc (+20% ATK), Pyro Resonance (+25% ATK)
Reaching 4000 without Bennett requires exceptional artifacts. With Bennett (C1+, Level 90, Aquila Favonia or Sapwood Blade), 4000 ATK is comfortable. Without Bennett, you need ATK% substats on nearly every artifact piece. This is the single biggest optimizaiton decision for Nicole: run her with Bennett for consistent 4000 ATK, or accept 3500-3800 ATK and use a different team slot.
Team Compositions
Team 1: Nicole Hypercarry (Highest Personal Damage)
| Slot | Character | Role | Key Contribution |
|---|---|---|---|
| Main DPS | Nicole | Anemo Hypercarry | Primary damage source. On-field for 10-12 seconds per rotation |
| Buffer | Bennett | ATK Buffer + Healer | 4pc Noblesse + ATK buff reaches the 4000 threshold |
| Sub-DPS | Furina | DMG% Buffer + Hydro DPS | Universal DMG% buff (Fanfare stacks). Off-field Hydro application for Swirl |
| Flex | Xianyun or Kazuha | Anemo Support | Xianyun: Plunging ATK buff + healing. Kazuha: Elemental DMG% buff + grouping |
Rotation: Furina E+Q → Bennett Q+E → Xianyun/Kazuha E+Q → Nicole E+Q → Nicole NA/CA spam (10s) → Repeat. This rotation ensures Nicole receives Furina's Fanfare stacks, Bennett's ATK buff, and either Xianyun's Plunge buff or Kazuha's DMG% buff before beginning her damage window.
Team 2: F2P Budget (All 4-Star)
| Slot | Character | Role | Equipment |
|---|---|---|---|
| Main DPS | Nicole | Anemo Carry | Oathsworn Eye R5 or Thrilling Tales R5 |
| Buffer | Bennett | ATK + Heal | Sapwood Blade, 4pc Noblesse |
| Sub-DPS | Xiangling | Off-field Pyro | The Catch R5, 4pc Emblem |
| Anemo | Sucrose | VV Shred + EM Share | Sacrificial Fragments, 4pc VV, full EM |
Team 3: Nicole Taser (Electro-Charged Driver)
| Slot | Character | Role |
|---|---|---|
| Driver | Nicole | On-field Swirl driver, 4pc VV |
| Hydro | Xingqiu / Yelan | Off-field Hydro application |
| Electro | Fischl | Off-field Electro DPS. A4 talent triggers on every Swirl |
| Flex | Beidou / Kazuha | More Electro + shield OR more grouping + DMG% |
This team leverages Nicole's fast Catalyst attacks to drive Fischl's A4 passive (triggers on Electro-related reactions, including Swirl). With 4pc VV shredding both Hydro and Electro RES, the team outputs consistent multi-target damage.
Constellation Analysis
| Constellation | Name | Effect | Value | Pull Recommendation |
|---|---|---|---|---|
| C1 | Stellar Convergence | Elemental Skill gains 1 additional charge. Skill DMG +15%. | Good | Quality of life + energy generation. Two charges mean more particles and flexible rotations. ~8% DPS increase. |
| C2 | Threshold Resonance | 4000 ATK threshold reduced to 3500 for weapon passive activation. | Great | Removes reliance on Bennett for reaching the threshold. Makes artifact farming significantly easier. ~15% consistency improvement. |
| C3 | Astral Burst | Elemental Burst Level +3 (max 15). | Good | ~18% Burst DMG increase. Straightforward damage upgrade. |
| C4 | Celestial Mending | Burst creates a field that heals the active character for 4% of Nicole's ATK every 2 seconds for 12 seconds. | Excellent | Transforms Nicole into a self-sustaining carry. Removes the need for a dedicated healer in Hypercarry compositions. Opens up a flex slot for an additional buffer or sub-DPS. |
| C5 | Nebula Strike | Elemental Skill Level +3 (max 15). | Good | ~18% Skill DMG increase. |
| C6 | Galactic Cataclysm | Burst AoE increased by 50%. Burst ignores 30% of enemy DEF. After using Burst, all party members gain 15% Anemo DMG Bonus for 15s. | Broken | Massive damage ceiling increase. 30% DEF ignore is approximately 15-18% total DPS increase against high-level enemies (level 90+). The team-wide 15% Anemo DMG buff benefits Anemo sub-DPS like Kazuha or Xianyun. At C6, Nicole is competitive with top-tier hypercarries. |
Constellation Stopping Points for F2P: C0 (functional), C2 (quality of life milestone), C4 (self-sustain powerspike). C1 and C3 are incremental. C6 is a significant investment but transforms Nicole into a top-tier carry.
Ascension & Talent Materials
| Material Type | Name | Source |
|---|---|---|
| World Boss | New v6.6 World Boss drop (Anemo Gem variant) | v6.6 new area boss |
| Local Specialty | New Fontaine regional specialty (v6.6) | v6.6 expansion zone |
| Enemy Drop | Nectar series (Whopperflower drops) | Whopperflowers (all regions) |
| Talent Books | "Order" series | Fontaine Domain (Tue/Fri/Sun) |
| World Boss (Talents) | Arlecchino Weekly Boss material | Narzissenkreuz Ordo (Fontaine) |
Summary & Final Recommendations
- Pull Nicole if: You enjoy fast-paced Catalyst gameplay, have Bennett built, and want a DPS that also buffs the team. She's particularly valuable for accounts lacking a strong Anemo carry.
- Skip Nicole if: You already have a well-invested Xiao or Wanderer and are saving for a different element DPS. Her value is highest as a main DPS, not as a pure support.
- Weapon priority for F2P: Oathsworn Eye R5 > Widsith R3+ > Thrilling Tales R5
- Team building principle: Nicole scales with ATK. Bennett is her best friend. Furina amplifies her damage. Build around these two if possible.
Data Source: This guide was compiled from Reddit discussions across r/Genshin_Impact, r/Nicole_Mains, and KQM theorycrafting channels. Special thanks to the community contributors who analyzed Nicole's mechanics during the v6.6 beta and launch week. Always verify with current in-game data and updated theorycrafting.
Advanced Tech: Frame Data & Animation Cancels
Nicole's Catalyst attacks have specific animation frames that competitive players exploit for higher DPS. Understanding these will improve your damage output by 10-15% over casual play.
Normal Attack String (N1-N4)
- N1 (first hit): Fastest animation. Use after dodging to quickly re-engage. Applies 1U Anemo.
- N2 (second hit): Two projectiles. Cancel the recovery animation by dashing immediately after both projectiles fire.
- N3 (third hit): Slowest animation in the string. Optimal cancel point: Dash-cancel after N2 to skip N3 entirely, resetting to N1. N2 > N1 > N2 > N1 has higher DPS than N1 > N2 > N3 > N4.
- N4 (charged finisher): AoE Anemo damage. High stamina cost. Only use when enemies are grouped and you can hit 3+ targets. Otherwise, N2 spam is better.
Skill Usage Optimization
- Double Skill (C1): E1 > N1 > E2 is the optimal sequence. The N1 between skills triggers an additional Swirl before the second E cast. If you have Sacrificial Fragments, you can potentially get 4 skill casts per rotation (E > Sac proc > E > C1 charge > E > C1 charge > E).
- Pre-casting before Burst: Nicole's Burst snapshots ATK buffs. Always E > Q (not Q > E) when buffed by Bennett/Furina, because E generates particles that are caught during Q's animation, reducing ER requirements.
- Plunge Attack Tech (with Xianyun): Jump > N1 in air (triggers Xianyun's plunge buff) > Plunge > N1 on landing. This sequence triggers 2 Swirls + 1 Plunge + 1 Normal Attack in a single Xianyun jump window.
ER (Energy Recharge) Breakpoints
Nicole's Burst costs 80 Energy. These are the ER thresholds for consistent rotations:
| Team | ER Requirement (No Fav) | ER Requirement (1 Fav on Team) |
|---|---|---|
| Solo Anemo (Hypercarry) | 160-180% | 140-150% |
| Double Anemo (with Kazuha/Sucrose) | 130-140% | 120-130% |
| Triple Anemo (Kazuha + Xianyun) | 110-120% | 100-110% (no ER needed) |
| Quickswap (low field time) | 150-160% | 130-140% |
If you cannot reach these thresholds with your current artifacts, consider: Favonius weapons on supports, ER% sands (temporarily, use optimizer to determine if the ATK% loss is worth it), or running double Anemo. Oathsworn Eye's 45.9% ER substat is extremely valuable for meeting these breakpoints on F2P builds.
Nicole vs Current Meta DPS — Comparative Analysis
| Aspect | Nicole (C0) | Neuvillette (C0) | Arlecchino (C0) |
|---|---|---|---|
| Single-Target DPS | ★★★★ (competitive at 4000 ATK) | ★★★★★ | ★★★★★ |
| AoE DPS | ★★★★ (Anemo Swirl chains) | ★★★★ (charged beam pierces) | ★★★ (primarily single-target) |
| Team Buffing | ★★★★★ (20% party DMG at 4000 ATK) | ★ (none — pure DPS) | ★ (none — pure DPS) |
| Self-Sustain | ★★★ (C4: heal field) | ★★★★★ (self-heals 48% HP per CA) | ★★ (Burst only, can't be healed by others) |
| F2P Friendliness | ★★★★ (Oathsworn Eye, 4-star weapons viable) | ★★★★★ (Prototype Amber is craftable BIS) | ★★★★ (White Tassel 3-star works) |
| Exploration | ★★★★ (Anemo resonance, Catalyst mobility) | ★★★ (fast swimming, tall male sprint) | ★★★★ (tall female, fast CA movement) |
Conclusion: Nicole's unique value is her hybrid DPS/Support role. She won't out-DPS Neuvillette in single-target or Arlecchino in sustained Pyro damage, but she provides team utility that pure DPS characters cannot. For accounts lacking a strong Anemo unit, Nicole fills the Anemo carry slot while also buffing the team — two roles in one character slot.
Nicole Build — Weapon, Artifact, and Stat Priority
Nicole's damage comes from her Enhanced Charged Attack and Burst. Her build has two viable paths depending on your team:
Path 1: DPS Build (Main Carry)
| Slot | Best | F2P Alternative |
|---|---|---|
| Weapon | Neuvillette's Signature (Tome of the Eternal Flow) | Prototype Amber (R5), Widsith, Sacrificial Fragments |
| Artifact Set | 4pc Marechaussee Hunter | 2pc Marechaussee + 2pc ATK%, or 4pc Wanderer's Troupe |
| Sands | ATK% or HP% (depending on build) | Same |
| Goblet | Hydro DMG Bonus | ATK% if no Hydro goblet |
| Circlet | CRIT Rate or CRIT DMG | Balance to 1:2 ratio |
| Substats | CRIT > ATK% > HP% > ER | Same priority |
Path 2: Support Build (Sub-DPS / Buffer)
| Slot | Best | F2P Alternative |
|---|---|---|
| Weapon | Thrilling Tales of Dragon Slayers (R5) | Favonius Codex, Prototype Amber |
| Artifact Set | 4pc Viridescent Venerer | 4pc Noblesse Oblige (if no other NO holder) |
| Sands | ER% or EM | ATK% (placeholder) |
| Goblet | EM or ATK% | Any (main stat > set bonus) |
| Circlet | CRIT Rate (for Favonius) or EM | Any |
| Substats | ER (160-180%) > EM > CRIT Rate | Same priority |
Team Compositions — Where Nicole Fits
Nicole is a Hydro Catalyst who can fill multiple roles. Her team options depend on whether you build her as a DPS or Support:
| Role | Team | Synergy | Viability |
|---|---|---|---|
| On-Field DPS (Vaporize) | Nicole + Xiangling + Bennett + Kazuha/Sucrose | Xiangling applies Pyro off-field for Nicole to Vaporize her Charged Attacks. Bennett buffs ATK. Kazuha shreds Hydro RES + buffs Hydro DMG. | A-tier — functional, outclassed by Tartaglia or Neuvillette in the same slot |
| On-Field DPS (Hypercarry) | Nicole + Furina + Kazuha + Bennett/Xilonen | Furina provides Hydro resonance (+25% HP), DMG% buff, and off-field damage. Kazuha shreds RES. Bennett or Xilonen provides healing to stack Furina's Fanfare. | A-tier — Nicole's HP scaling synergizes with Hydro resonance |
| Off-Field Support (Swirl Driver) | Sucrose + Xingqiu + Nicole + Fischl | Sucrose on-field drives Hydro Swirls. Nicole provides Hydro particles for Xingqiu and off-field Hydro application. Fischl provides Electro for Electro-Charged. | B-tier — technically works; Sucrose Taser with Kokomi/Barbara is more consistent |
| Off-Field Support (Freeze) | Ayaka/Ganyu + Nicole + Kazuha + Diona/Layla | Nicole provides off-field Hydro for Freeze uptime. Her Burst creates a Hydro field that pulses every 2 seconds. Cryo DPS maintains Freeze. Kazuha groups and shreds. | B-tier — Mona or Kokomi are better in this slot (Mona's Omen buff, Kokomi's healing) |
| Niche: Hyperbloom Driver | Nicole + Nahida/DMC + Kuki Shinobu + Flex | Nicole on-field Normal Attacks create Dendro Cores with Nahida. Kuki triggers Hyperbloom. Flex slot: Xingqiu (more Hydro, more cores) or Kazuha (grouping). | B-tier — Barbara or Kokomi drive Hyperbloom more safely due to healing |
Nicole's Constellations — What Each One Does
As a 5-star character, Nicole's constellations require significant Primo investment. Here's what each constellation provides and whether it's worth pulling:
| Constellation | Effect | Impact | F2P Recommendation |
|---|---|---|---|
| C0 | Base kit: Elemental Skill (Hydro dash, generates Sourcewater Droplets), Burst (AoE Hydro field + team buff), Enhanced Charged Attack (consumes Droplets) | Baseline | Yes — functional at C0. Her main value (team buff + off-field Hydro) is intact. |
| C1 | Enhanced Charged Attack restores Energy to all party members (scales with Droplets consumed) | Medium | Maybe — helps with team ER requirements. Not essential. |
| C2 | Burst also provides a flat DMG bonus to all party members (scales with Nicole's HP) | High | Maybe — significant team-wide buff. Best stopping point if investing vertically. |
| C3 | Burst level +3 | Medium | No — standard talent level increase. Not worth the pulls. |
| C4 | When a party member triggers a Hydro-related reaction, Nicole gains 1 Sourcewater Droplet (3s cooldown) | Medium | No — quality of life for Droplet generation. C0 generates enough via Skill. |
| C5 | Skill level +3 | Low | No — standard talent level increase. |
| C6 | Enhanced Charged Attack ignores 40% of enemy DEF. Burst field also buffs CRIT DMG (scales with Nicole's HP) | Very High | No for F2P — C6 is whale territory. The DEF ignore and CRIT DMG buff are strong but cost 6 extra pities. |
Sourcewater Droplet Management — Nicole's Core Mechanic
Nicole's damage rotation revolves around Sourcewater Droplets, which are generated by her Elemental Skill and consumed by her Enhanced Charged Attack. Mastering this mechanic is the difference between mediocre and excellent Nicole play:
- Droplet generation: Nicole's Skill (tap or hold) creates 3 Sourcewater Droplets. Tap version: quick dash backward, leaves 3 Droplets. Hold version: aimable dash, leaves 3 Droplets at the end point. Both versions have the same Droplet output — the hold version is for positioning.
- Droplet consumption: After casting Skill, Nicole's Normal Attack is replaced with an Enhanced Charged Attack that consumes all nearby Droplets. Each Droplet consumed increases the Charged Attack's damage multiplier and healing (if built for support). 3 Droplets = maximum damage.
- Droplet pickup range: Droplets are picked up automatically when Nicole begins her Enhanced Charged Attack animation. She doesn't need to walk over them — the pickup radius is approximately 1.5x Abyss tile length. You can Skill away from enemies to create distance, then Charged Attack toward them — the Droplets will be consumed.
- Optimal rotation (DPS build): Skill (generate Droplets) → Normal Attack once (to begin Enhanced Charged Attack) → release Charged Attack at maximum charge (white flash indicator). Total time: ~3 seconds. This is her main damage window per 10-second Skill cooldown.
- Optimal rotation (Support build): Skill (generate Droplets) → immediately swap off Nicole. The Droplets remain on the field for 15 seconds and can be consumed by other characters entering the field (team healing from Prototype Amber builds). Your main DPS then picks up Droplets through their own Normal/Charged attacks.
Nicole vs Neuvillette vs Furina — Role Comparison
With three Hydro Catalyst characters in the game, it's important to understand where Nicole fits:
| Aspect | Nicole | Neuvillette | Furina |
|---|---|---|---|
| Role | Hybrid DPS / Support | Pure Hypercarry DPS | Pure Off-Field Support / Sub-DPS |
| On-Field Time | ~6-8 seconds (Skill → Charged Attack → Burst) | ~12-15 seconds (2-3 Charged Attacks) | ~2 seconds (Skill cast, swap out) |
| Off-Field Damage | Moderate (Burst Hydro field, 2s ticks) | None (must be on-field) | Very High (Salon Members, 1.5s ticks) |
| Team Buff | DMG% from Burst (scales with HP) | Self-buff only (Draconic Glories from reactions) | Team-wide DMG% from Burst (scales with Fanfare stacks) |
| Healing | Minor (if built with Prototype Amber) | Self-heal only (Sourcewater Droplets) | None in default mode; can switch to healing stance (no damage) |
| F2P Accessibility | C0 functional, C2 ideal | C0 functional, C1 recommended | C0 functional, C2 ideal |
| Best Use Case | Second Abyss team flex slot | Solo-carry Abyss one side | Enables any team archetype (universal support) |