Genshin Impact F2P Team Compositions — Complete Budget Builds
Quick Reference: Four proven team compositions using exclusively 4-star characters and weapons. Each includes complete gear templates, detailed rotations, and content recommendations. These teams are the foundation of every successful F2P account.
Team 1: Quicken National
Playstyle: Quick-swap dual reaction. Xiangling's Pyronado snapshots Bennett's ATK buff. Xingqiu provides Hydro for Vaporize. Sucrose groups enemies and shares EM. This team clears any Abyss cycle.
| Slot | Character | Weapon | Set | Main Stats |
|---|---|---|---|---|
| Main DPS | Xiangling | The Catch R5 | 4pc Emblem | ER / Pyro / CRIT |
| Healer/Buffer | Bennett | Sapwood Blade | 4pc Noblesse | ER / HP / Healing |
| Sub-DPS | Xingqiu | Sacrificial Sword R3+ | 4pc Emblem | ER / Hydro / CRIT |
| Driver | Sucrose | Sac Fragments / TTDS | 4pc VV | EM / EM / EM |
Rotation: Bennett Q+E > Sucrose E (VV shred) > Xingqiu Q+E > Xiangling Q+E (snapshot buffs) > Sucrose NA drive
Team 2: Freeze Lockdown
Playstyle: Permafreeze crowd control. Enemies cannot move while Frozen. Chongyun's E field infuses Cryo. Xingqiu applies Hydro. Sucrose groups and applies VV shred.
| Slot | Character | Weapon | Set | Main Stats |
|---|---|---|---|---|
| Cryo DPS | Chongyun | Prototype Archaic | 2pc Blizzard + 2pc Noblesse | ATK / Cryo / CRIT DMG |
| Hydro | Xingqiu | Sacrificial Sword R3+ | 4pc Emblem | ER / Hydro / CRIT |
| Healer/Buffer | Barbara | Thrilling Tales R5 | 4pc Clam | HP / HP / Healing |
| Grouper | Sucrose | Sacrificial Fragments | 4pc VV | EM / EM / EM |
Rotation: Sucrose E+Q (group) > Barbara E (Wet + TTDS) > Xingqiu Q+E > Chongyun E (Cryo field) > Sucrose NA (Swirl Cryo) > Chongyun Q > Chongyun NA spam
Team 3: Hyperbloom Seed
Playstyle: Create Dendro Cores via Dendro+Hydro, trigger Hyperbloom via Electro. Damage scales purely with the Electro trigger's EM and Level — zero ATK/CRIT needed. Most resource-efficient team.
| Slot | Character | Weapon | Set | Main Stats |
|---|---|---|---|---|
| Dendro | Collei / DMC | Favonius Warbow / Sac Sword | 4pc Deepwood | ER / Dendro / CRIT |
| Hydro | Xingqiu | Sacrificial Sword R3+ | 4pc Emblem | ER / Hydro / CRIT |
| Healer | Barbara | Thrilling Tales R5 | 4pc Clam | HP / HP / Healing |
| Trigger | Kuki Shinobu | Iron Sting R5 | 4pc Paradise Lost | EM / EM / EM (900+, Level 90) |
Rotation: Collei/Traveler E+Q > Xingqiu Q+E > Barbara E > Kuki E (trigger all Cores) > Kuki NA drive
Team 4: Superconduct Physical
Playstyle: Superconduct (Cryo+Electro) reduces enemy Physical RES by 40% for 12s. Razor deals sustained Physical damage during the debuff window.
| Slot | Character | Weapon | Set | Main Stats |
|---|---|---|---|---|
| Physical DPS | Razor / Freminet | Prototype Archaic / Snow-Tombed | 4pc Pale Flame | ATK / Physical / CRIT |
| Cryo Support | Rosaria (C2+) | Favonius Lance | 4pc Noblesse | ER / Cryo / CRIT Rate |
| Electro Support | Fischl | Stringless / Favonius | 2pc TF + 2pc ATK | ATK / Electro / CRIT |
| Shielder/Healer | Diona | Sacrificial Bow / Favonius | 2pc Tenacity + 2pc Maiden | HP / HP / Healing |
Rotation: Diona E (shield) > Rosaria E+Q (Cryo + Noblesse) > Fischl E (Electro = Superconduct proc) > Razor Q > Razor NA spam 12s
Team Comparison Matrix
| Team | Single Target | AoE | Survival | Ease | Abyss |
|---|---|---|---|---|---|
| Quicken National | ★★★★★ | ★★★★ | ★★★ | ★★ | S |
| Freeze | ★★★ | ★★★ | ★★★★★ | ★★★ | A |
| Hyperbloom | ★★★★ | ★★★★★ | ★★★★ | ★★★★ | S |
| Physical | ★★★★ | ★★ | ★★★★ | ★★★★ | A |
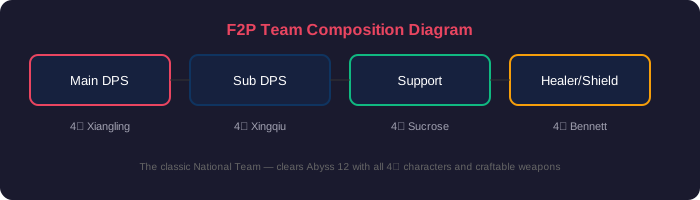
Standard F2P team structure — DPS + Sub-DPS + Support + Sustain
Investment Priority — Which Team to Build First
For a new F2P account, build teams in this order based on resin efficiency and character availability:
- Hyperbloom Seed (first team): Requires only 1 heavily invested character (Kuki Level 90 + full EM). Everyone else can be Level 70 with +12 artifacts. Clears all story content and Abyss Floors 9-11 with minimal investment. Start here.
- Quicken National (second team): Requires Xiangling C4 (free from Abyss + shop) and The Catch R5 (3-4 days fishing). Higher investment but higher ceiling. This is your Abyss Floor 12 team.
- Freeze (third team, optional): Build only if you pull Ayaka or Ganyu later. The 4-star version is functional but outclassed by the above two teams for Abyss.
- Physical (niche): Build only if you love Razor's playstyle. Physical damage has no amplifying reactions and struggles against Ruin enemies (70% Physical RES).
Frequently Asked Questions
Quicken National has the highest damage ceiling at high investment. Hyperbloom clears more consistently at low-to-medium investment because it doesn't depend on CRIT RNG.
Yes. All four teams have verified 36-star clears on video from the F2P theorycrafting community. The key is artifact investment — 25+ CV per piece on your DPS makes the difference between 33 and 36 stars.
Xingqiu appears on 3 of the 4 teams above. He is the single best 4-star in the game. If you only have one Xingqiu (you can't use him on both Abyss sides), build Hyperbloom on one side (Xingqiu mandatory for Hydro application) and Quicken National on the other (use Sucrose driver, Kuki for Electro). For the Quicken National side without Xingqiu, use double Pyro (Xiangling + Bennett) + double Electro (Fischl + Kuki).
Artifact Substats — What to Chase
Artifact substats matter more than set bonuses for F2P teams. A mediocre set with perfect substats will outperform a perfect set with bad substats. Here's what each team member prioritizes:
| Character | Priority 1 | Priority 2 | Priority 3 | Target |
|---|---|---|---|---|
| Xiangling | ER (180-220%) | CRIT Rate/DMG | ATK% / EM | 60:120 CRIT, 200% ER |
| Bennett | ER (200-230%) | HP% | Flat HP | 200% ER, 25k HP |
| Xingqiu | ER (180-200%) | CRIT Rate/DMG | ATK% | 60:120 CRIT, Sac Sword R3+ |
| Sucrose | EM | EM | ER (130-150%) | 800+ EM, 4pc VV |
| Kuki Shinobu | EM (800-1000) | HP% | Flat HP | 900+ EM, Level 90 |
| Chongyun | CRIT DMG | ATK% | CRIT Rate | 40:140 CRIT (Blizzard set boosts CR) |
| Razor | CRIT Rate/DMG | ATK% | ER (120-130%) | 70:140 CRIT |
Constellation Priorities — Which Constellations Matter
You'll naturally acquire 4-star constellations through standard banner pulls and Paimon's Bargains shop. Here's what transforms each character:
- Xiangling C4: Extends Pyronado duration by 40% (10s to 14s). This is her breakpoint constellation — at C4, Xiangling becomes competitive with many 5-star Pyro DPS. You can buy her from Paimon's Bargains in January and July.
- Xingqiu C2: Extends Rain Sword duration by 3s and reduces enemy Hydro RES by 15%. Combined with Sac Sword R3+, this gives near-100% Hydro application uptime.
- Bennett C1: Removes the HP threshold on his ATK buff. Without C1, Bennett's buff only works when the character is above 70% HP — which fails whenever you take damage. C1 removes this restriction entirely.
- Sucrose C1: Gives a second charge of her Elemental Skill. This doubles her particle generation and Swirl damage output per rotation, smoothing ER requirements significantly.
- Kuki Shinobu C2: Extends her Skill ring duration by 3s, closing the gap between 12s uptime and 15s cooldown. This means near-100% Electro application for Hyperbloom triggering.
- Rosaria C2: Extends Burst duration by 4s. At C2, Rosaria's Burst ticks 12 times (up from 8), massively improving Cryo application for Superconduct teams.
Energy Recharge Breakpoints — Never Miss a Rotation
The #1 reason F2P teams fail in Abyss is one character not having their Burst ready when the rotation calls for it. These are the tested minimum ER thresholds:
| Team | Character | ER: Solo Element | ER: With Battery |
|---|---|---|---|
| National | Xiangling | 220-240% | 180-200% (with Bennett funneling) |
| National | Xingqiu | 200-220% | 180% (with Sac Sword R3+) |
| National | Bennett | 200-230% | 180% (self-sufficient with E spam) |
| Hyperbloom | Kuki | N/A (Skill-based, no ER needed) | N/A |
| Hyperbloom | Collei/DMC | 200-220% | 180% (with Favonius weapon) |
| Freeze | Chongyun | 140% | 120% (one partner with Sac/Fav) |
| Physical | Razor | 130% | 120% (Fischl battery) |
Practical tip: ER breakpoints change based on enemy particle drops — fewer enemies means more ER needed. The values above are conservative estimates for single-target boss scenarios. Test your rotation on Masanori (Inazuma samurai) — if your Bursts are up after one full rotation, your ER is sufficient.
Budget Weapons — Free-to-Play Arsenal
Every weapon recommended in this guide is obtainable without spending Genesis Crystals. Here's where to get them:
| Weapon | Best For | How to Get | Time Investment |
|---|---|---|---|
| The Catch R5 | Xiangling | Fishing in Inazuma. Trade at Inazuma Fishing Association (Kujirai Momiji) | 3-4 days casual, ~5 hours speedrun |
| Sapwood Blade | Bennett | Sumeru craftable. Unlock via Aranyaka quest | ~30 min after quest unlock |
| Prototype Archaic | Chongyun, Razor | Forged at any blacksmith using Northlander Claymore Billet | Billet from weekly bosses (RNG) |
| Iron Sting | Kuki Shinobu | Forged at any blacksmith using Northlander Sword Billet | Billet from weekly bosses (RNG) |
| Snow-Tombed Starsilver | Razor (Physical) | Dragonspine exploration. Light all 8 Ancient Rime tablets in the secret room | ~2 hours exploration |
| Thrilling Tales R5 | Barbara, Sucrose | 3-star weapon from any wish banner. You will naturally R5 by AR30 | 0 — automatic |
| Sacrificial Sword | Xingqiu | 4-star gacha weapon. R1 is perfectly usable; R3+ is ideal | RNG, but R1 sufficient |
Surviving Abyss Without a 5-Star Shielder
Most meta teams run Zhongli for his unbreakable shield. These F2P teams don't have him. Here's how to survive Floor 12 without one:
- Bennett's healing at C1: His Burst heals approximately 5-7k per tick. Any character standing inside his circle can tank most attacks. The key is staying inside — don't dodge out of it.
- Xingqiu's Rain Swords: At talent level 8, Rain Swords reduce incoming damage by 29% and provide interruption resistance. Combined with Bennett's healing, your on-field character is nearly unkillable.
- Diona's shield: In the Physical team, Diona provides both a shield (Hold E for stronger shield) and healing (Burst). Her shield scales with HP and gains 75% absorption bonus from her passive talent. At 30k HP, her Hold E shield absorbs approximately 12k damage.
- Barbara's emergency heal: In the Freeze and Hyperbloom teams, Barbara's Burst is a full-party instant heal. If she's using Thrilling Tales, swap to her, cast Burst, then immediately swap to your main DPS — they'll receive both the heal and the 48% ATK buff.
- Dodge timing with Burst i-frames: Every character's Burst animation provides approximately 1.5-2 seconds of invulnerability. If you're at low HP and no healing is available, time a Burst animation to i-frame through big enemy attacks.
Spiral Abyss Floor 12 — Enemy Matchups (May 2026)
| Enemy Lineup | Recommended Team | Why |
|---|---|---|
| Consecrated Beasts | National | Pyro shreds Dendro/Cryo beasts. Bennett's healing outpaces their damage-over-time auras. Xingqiu's damage reduction prevents one-shots from their combo attacks. |
| Maguu Kenki | National or Hyperbloom | Hyperbloom projectiles track the boss during his dash attacks. National has higher single-target DPS during his stationary phases. |
| Wenut / Ruin Serpent | Hyperbloom | These bosses have 55%+ all-element RES during windup phases. Hyperbloom bypasses RES through transformative reaction damage. |
| ASIMON (Invisible Phase) | Hyperbloom | Electro+Dendro triggers Quicken, which instantly reveals ASIMON during his invisible phase without needing the special mechanic. |
| Triple Kenki | Freeze | Freeze prevents all three from attacking simultaneously. Without Freeze, all three Kenkis can one-shot your DPS at the same time. |
| Eremite Summoners | Hyperbloom or Physical | Summoners spawn adds continuously. Hyperbloom's AoE clears adds automatically. Razor's Burst AoE handles waves while damaging the main target. |
F2P Progression Timeline — When to Build Each Team
| AR Range | Focus | Primary Team | Investment Needed |
|---|---|---|---|
| AR 1-25 | Story & exploration | Whatever you pull | Level weapons to max. Ignore artifacts entirely. |
| AR 25-35 | Start assembling | Hyperbloom (start) | Get Collei free from Abyss Floor 4-3. Level Kuki to 70. +8 artifacts with correct main stats only. |
| AR 35-45 | Talent domains | Hyperbloom (complete) | Kuki to 90 — this is critical. Everyone else 70/80. +16 artifacts, correct main stats, ignore substats. |
| AR 45-50 | 5-star artifact farming starts | National Team | Farm Momiji-Dyed Court (Emblem domain) exclusively. This one domain gears Xiangling + Xingqiu simultaneously — the most resin-efficient domain for F2P. |
| AR 50-55 | Abyss Floors 9-11 | National + Hyperbloom | Two full teams. +20 artifacts on main DPS. Crown Xiangling Burst and Bennett Burst. |
| AR 55+ | Abyss Floor 12 | All four teams (optional) | 25+ CV (Crit Value) per artifact. Triple-crown key talents. This is the endgame resin grind — expect 2-3 months of daily farming. |
Critical rule: Do NOT farm artifact domains before AR 45. AR 45 guarantees one 5-star artifact per domain run. Pre-AR45 artifact farming is the #1 resin waste for new players — you will replace everything at AR 45 anyway. Spend pre-45 resin on: weapon ascension materials, talent books, Mora leylines, and EXP leylines.
Frequently Asked Questions (Continued)
Sapwood Blade for Bennett (highest base ATK among craftable swords, and its passive gives a mini-Bennett buff to teammates). Iron Sting for Kuki (her best-in-slot 4-star for Hyperbloom). Prototype Amber for Barbara (turns her into a decent healer + energy generator for the team). Everything else is replaceable by gacha 4-stars or free event weapons.
No. The weapon banner (Epitome Invocation) requires up to 240 wishes — equivalent to three guaranteed 5-star characters. The Fate Point system does not carry over between banners. Pulling on weapon banners as F2P will cost you 1-2 limited 5-star characters. The only exception: if both featured weapons are useful to your account AND you have 200+ wishes saved, you can consider it. Otherwise, stick to character banners exclusively.
Kuki is the best Hyperbloom trigger because her Skill ring pulses Electro every 1.5 seconds with 100% uptime at C2. Alternatives: Lisa (free) can trigger Hyperbloom with Normal Attacks and her Burst, but requires higher ER investment. Fischl (gacha 4-star) is less consistent because Oz targets randomly. Dori (gacha 4-star) with full EM can trigger Hyperbloom via her Burst link. If you have none of these, build National first and wait for a Kuki rate-up banner — she typically appears on banners every 3-4 months.
Xiangling is permanently free from clearing Spiral Abyss Floor 3-3. Xingqiu is available from Paimon's Bargains (Starglitter shop) in March and September, and frequently appears on 4-star rate-up banners. Both are also available from Lantern Rite (annual Chinese New Year event) as a free 4-star selection. With normal play, you should have both by AR35-40.