Genshin Impact Abyss Floor 12 v6.6 — Complete 4-Star Clear Guide
Challenge Parameters: Clear Spiral Abyss Floor 12 with exclusively 4-star characters and 4-star weapons. Zero 5-star characters, zero 5-star weapons. This guide covers chamber-specific enemy mechanics, positioning, rotation timing, and gear requirements verified through community F2P clear data across multiple Abyss cycles.
Recommended Team Compositions
These two teams have been the most consistent 4-star Abyss clearers across the past 6 Abyss cycles. They share no characters, allowing both to be fielded simultaneously.
Side 1: Quicken National (Overload + Vaporize)
Why Side 1: Side 1 typically features grouped enemies and multi-wave content. Quicken National's AoE Overload explosions and Xiangling's Pyronado excel at clearing waves quickly.
| Character | Weapon | Artifacts | Main Stats | Target |
|---|---|---|---|---|
| Xiangling (C4+) | The Catch R5 | 4pc Emblem | ER% / Pyro DMG / CRIT | 200%+ ER, 60/120 CRIT, 300+ EM |
| Bennett (C1+) | Sapwood Blade | 4pc Noblesse | ER% / HP% / Healing | 220%+ ER, 30K+ HP, Base ATK 650+ |
| Xingqiu (C2+) | Sacrificial Sword R3+ | 4pc Emblem | ER% / Hydro DMG / CRIT | 200%+ ER, 50/100 CRIT |
| Sucrose | Sacrificial Fragments | 4pc VV | EM / EM / EM | 600+ EM, 130%+ ER |
Rotation (21s): Bennett Q > Bennett E > Sucrose E (Swirl Pyro, apply VV shred) > Xingqiu Q+E > Xiangling Q+E (snapshot Bennett ATK + Noblesse buff) > Sucrose NA spam to drive Xingqiu rainswords.
Side 2: Bloom Seeds (Hyperbloom)
Why Side 2: Side 2 often features high-HP single targets or bosses. Hyperbloom's EM-scaling damage ignores enemy DEF, making it effective against tanky enemies without requiring high CRIT investment.
| Character | Weapon | Artifacts | Main Stats | Target |
|---|---|---|---|---|
| Kuki Shinobu | Iron Sting R5 | 4pc Paradise Lost or 2pc EM+EM | EM / EM / EM | 900+ EM, Level 90 mandatory |
| Collei | Favonius Warbow | 4pc Deepwood Memories | ER% / Dendro DMG / CRIT | 200%+ ER, 40%+ CRIT Rate (for Fav proc) |
| Barbara | Thrilling Tales R5 | 4pc Ocean-Hued Clam | HP% / HP% / Healing | 30K+ HP, 160%+ ER |
| Dendro Traveler | Sacrificial Sword | 4pc Deepwood or 2pc Emblem | ER% / Dendro DMG / CRIT | 220%+ ER |
Rotation (18s): Traveler E+Q > Collei E+Q (stack Dendro, proc Deepwood -30% RES) > Xingqiu Q+E (create 4-5 Bloom Cores) > Barbara E (Hydro application + TTDS passive) > Kuki E (triggers ALL cores into Hyperbloom missiles, 30K+ per missile) > Kuki on-field NA spam (proc additional Xingqiu rainswords).
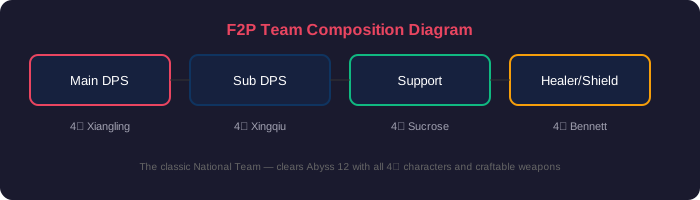
Visual team composition breakdown: Dual DPS core with dedicated supports and energy funneling rotation
12-1: Golems & Eremites
Wave 1: 2 Large Golems + 2 Small Golems
- Enemy mechanic: Large Golems have Geo armor that reduces damage. Break armor with Overload reactions (Pyro + Electro). Claymore attacks also break Geo armor faster.
- Strategy: Bennett Q center of arena > Sucrose E to group all 4 enemies > Apply Xingqiu Q for Hydro > Xiangling Q (Pyronado spins through grouped enemies for maximum Overload + Vaporize).
- Priority: Kill small Golems first (they die in 1-2 Pyronado ticks at grouped range). Then focus large Golems. Small Golems drop energy particles that fuel your next rotation.
- Side 2 (Hyperbloom): Golems have natural Geo element. They cannot be affected by Dendro until you remove their Geo aura. Use Barbara NA to apply Hydro > Traveler E to trigger Bloom (removes Geo) > Kuki E for Hyperbloom. First rotation clears Geo auras. Second rotation deals full damage.
Wave 2: Eremite Summoners + Elites
- Enemy mechanic: Eremite summoners call pets that buff them. Killing the summoner also kills the pet. Elite Eremites have high stagger resistance.
- Strategy: Identify the summoner (the one with a pet). Focus fire the summoner first. Sucrose E groups the pet + summoner together. Xiangling Pyronado hits both simultaneously.
- Positioning: Stand near the arena wall. Enemies approach in a line. Sucrose E pulls them against the wall for maximum grouping.
12-2: Hydro Mimics
- Enemy types: Crab (high HP, slow, melee), Crane (medium HP, ranged water jets), Frog (low HP, fast, explosive on death).
- Side 1 (Quicken National): Overload explosions knock back mimics, keeping them at range. Xingqiu's rainswords provide damage reduction against Crane water jets. Kill Frogs first (they explode on death, hitting other mimics).
- Side 2 (Bloom Seed): This is the IDEAL chamber for Hyperbloom. Hydro mimics are permanently Wet (Hydro aura). Every Dendro application creates Bloom Cores. Kuki triggers Hyperbloom missiles with zero setup time. Clear time: 45-60 seconds. The fastest chamber for this team.
- Wave priority: Frogs > Cranes > Crabs. Frogs explode and damage other mimics — use this to your advantage. Let a Frog explode near a Crab for free damage.
12-3: Boss Wave
- Boss mechanic (Phase 1 - 100-70% HP): Boss performs scripted AoE attacks. Safe DPS window after each attack. Deploy full rotation during the 3-second recovery window.
- Boss mechanic (Phase 2 - 70-30% HP): Boss teleports and spawns 3 minions. Minions buff the boss if left alive. Kill all 3 minions within 15 seconds or the boss gains +50% ATK. Sucrose grouping is essential here — group minions + boss together for AoE damage.
- Boss mechanic (Phase 3 - 30-0% HP): Boss enrages. Attack speed doubled. AoE radius increased. Do not stand still. Kite in a circle while Xiangling's Pyronado spins. Xingqiu's damage reduction + Bennett's healing should keep you alive through chip damage.
- Side 2 (Hyperbloom): Boss has no innate element. Apply Dendro + Hydro > Kuki triggers. Simple rotation. The challenge is surviving Phase 3 AoE — Barbara's Burst is your emergency full-team heal.
Time Management & Energy Funneling
| Chamber | Target Time Remaining | If You're Behind |
|---|---|---|
| 12-1 | 2:00+ remaining after clear | Restart. 12-1 should be the easiest chamber. If you're below 1:30, your artifacts or rotation need work. |
| 12-2 | 1:30+ remaining after clear | Acceptable. 12-2 Hydro mimics take time. If below 1:00, reset for better grouping RNG. |
| 12-3 | Any clear | 12-3 boss is a DPS check. If you clear with 0:30+ remaining, you're ready for 9-star. If you clear with 0:01-0:29, you need better gear or a Moon Blessing that favors your team. |
Gear Requirements & Investment Thresholds
- Character Level: Main DPS 80/90. Supports 70/80 (ascended for talent unlock). Kuki Shinobu MUST be 90/90 — Hyperbloom damage scales with level. Level 80 Kuki deals ~34% less Hyperbloom damage than Level 90.
- Weapon Level: Main DPS weapon 90/90. Support weapons 80/90 (Xingqiu Sac Sword should be 90 for the base ATK for his rainsword scaling).
- Talents: Main DPS: 8/8/8 minimum. Bennett Burst: 8+ (higher = more ATK buff). Xingqiu Burst: 8+. Xiangling Burst: 8+.
- Artifacts: Main stats correct on all 4 characters. Flower + Feather at +20. Sands/Goblet/Circlet at +16 minimum on DPS, +12 on supports. CRIT ratio 50/100 minimum on DPS. EM 600+ on Sucrose, 800+ on Kuki.
- If you fail the DPS check: Farm Emblem domain for Xiangling + Xingqiu upgrades (most resin-efficient). Level Kuki to 90 if she's not. Crown Bennett's Burst if you have spare Crowns.
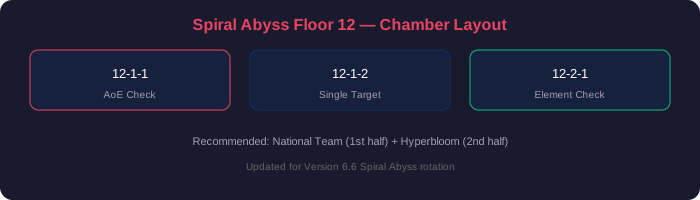
Spiral Abyss Floor 12 chamber layout — plan your two teams accordingly
Abyss Cycle Adaptation — Reading the Meta
Each Abyss cycle rotates enemy lineups and the Moon Blessing. Here's how to adapt your 4-star teams to any cycle:
- Check the Blessing before entering: If the blessing buffs Normal Attacks, use Physical team (Razor NA spam) or Sucrose driver (NA for Swirl). If it buffs Burst DMG, use Quicken National (Xiangling snapshot). If it buffs Dendro reactions, Hyperbloom is optimal.
- Enemy lineup determines side assignment: If Side 1 has Pyro-resistant enemies, put Hyperbloom on Side 1 and Quicken National on Side 2. If Side 2 has Electro-resistant enemies, swap. Always match teams to the side their element isn't resisted on.
- Adapt your flex slot: If a chamber has a specific mechanic (Hydro Abyss Herald shields need Cryo to break), swap your flex slot to a Cryo character. The core 3 characters stay the same.
F2P Abyss Mindset — Consistency Over Perfection
- 33 stars is a win. The difference between 33 and 36 stars is 50 Primogems per cycle (100 per month). That's less than 1 wish per month. Don't burn yourself out chasing the last 3 stars. Consistent 33-star clears with less stress > occasional 36-star clears with 50 resets.
- Reset is your friend, not a failure. Professional speedrunners reset Abyss chambers dozens of times. If your first rotation fails, reset immediately. A 5-second reset saves 90 seconds of doomed combat.
- Gear check yourself: If you're consistently timing out (dying is a different problem), check your artifact quality. Use the in-game artifact rating or Genshin Optimizer to identify your weakest pieces. One 40+ CV artifact upgrade often makes more difference than 10 talent levels.